


In this article, you'll find three separate solutions to sync data from BigQuery to Salesforce:
So you need to move data from BigQuery to Salesforce? Finding the right solution can be difficult, but look no further! This article covers three separate methods for getting the job done so you can pick the method that matches your skills and needs. You likely already have a use case for syncing data from BigQuery to Salesforce, but here are some common ones:
- Providing sales teams rich first-party data to help them close new business.
- Helping marketing teams create high-quality, customized email drip campaigns.
- Supplying product teams valuable data to understand and improve the customer
Regardless of your use case, I hope one of these solutions works for you and your organization.
Before diving in, here's a quick summary of the use cases of each method:
- Data Loader: Good option for medium sized, one-off syncs. You can upload up to 5 million records.
- Data Import Wizard: Good option for small, one-off syncs. You can upload up to 50,000 records.
- Reverse ETL with Census: Good option for users who want to constantly sync BigQuery and Salesforce in an automated fashion. Useful for all syncs, both large and small.
If your use case matches one of the methods above, save yourself some time and skip ahead. Let's take a look at the first method.
Method #1: Data Loader
Data Loader allows users to import data (up to 5m records at a time) directly into Salesforce. Data Loader, compared to the Data Import Wizard we will introduce in the later section, is more flexible since you can load larger records of 50,000 up to 5,000,000.
Prerequisites
- Install Data Loader on your macOS or Windows. When you execute the installer file, you can download Data Loader and open it.
Before we use Data Loader to import data, we first need to export data from BigQuery. There are several ways to export data from BigQuery. Let’s have a look at one of the options.
Step 1: Export data from GCP BigQuery console
This can be the easiest way to export data since you can use the GCP console. Other export options can require additional settings but as long as you can access the console, you can download files. The console not only lets you export data in csv but also in various formats such as JSON, Avro, or Parquet (currently in preview) with a compression type. To export, follow the steps below.
- Go to the Google Cloud Console and open the BigQuery page.
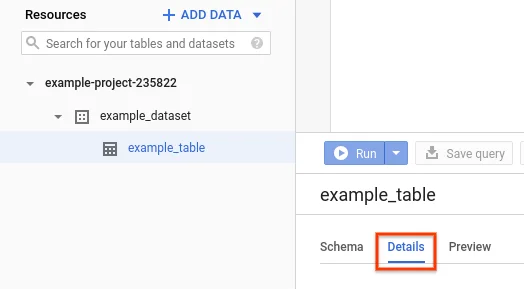
- Find the Explorer panel, expand your project and dataset. Select the table you want to export.
3. Go to the details panel. Click Export and select Export to Cloud Storage.
4. When you see the Export table to Google Cloud Storage dialog:
- For Select Google Cloud Storage location, choose your target bucket, folder, or file.
- For Export format, select the format in which you want to save your data. Currently, CSV, JSON (new-line format), or Avro is available.
- For Compression, you can leave the default value - None or GZIP. The Arvo format is not supported with GZIP in the console. It is only supported via the bq command-line tool or the API.
5. Click Export.
6. Go to the Cloud Storage location to find the exported files. You can download them into your local machine if you want.
Step 2: Load data into Salesforce
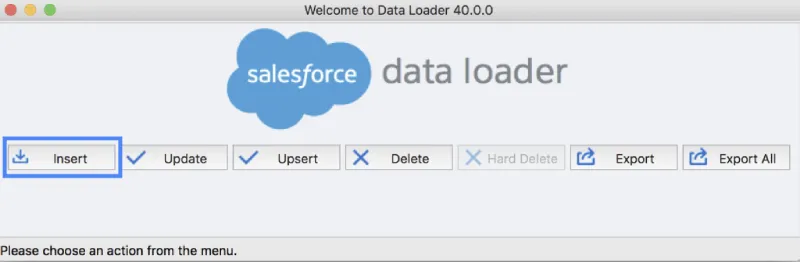
Now, we have the exported file. We can load the file using Data Loader. Follow the steps below:
- If you haven't already, install Data Loader on your macOS or Windows. When you execute the installer file, you can select and download Data Loader and its installer.command file.
- Configure Data Loader by deciding batch size, null value handling, host address, login credentials, compression type, timeout, query request size, encoding, and more. These settings will differ depending on your environment.
3. To execute the data loader, you can use either batch mode or Data Loader CLI.
- Batch Mode: you can run a series of data loading tasks using the Windows command-line tool.
- Data Loader CLI: you can perform more flexible tasks using the cli tool. You can insert, update, or delete records. You can programmatically map fields between the source and target data and use CSV data sources to import into Salesforce.
As I mentioned previously, data loader allows you to import records of 50,000 up to 5,000,000. If you’re importing less records than that, you might consider the next method, Salesforce Data Import Wizard.
Method #2 - Data Import Wizard
This method is similar to the previous one in that you need to export data from BigQuery and load it into Salesforce. But, you can use different methods to export and import. You can consider using the import method above (Data Import Wizard) with the export method below. By learning various methods, you can have more choices.
Prerequisites
- Working knowledge of python
Step 1: Export from BigQuery via bq command
If you prefer a CLI tool to interact with your data, this option will suit you. The bq command is the command line tool for Big Query. One big advantage of using the bq command is eliminating the need to constantly click through a user interface to successfully export data on the BigQuery console. With bq command, you can simply execute a command in your local environment and export data into Google Storage and then download from there.
The command starts with bq extract:
bq extract \
--compression GZIP \
'mydataset.mytable' \
gs://target-bucket/exportfile.csv
The example command will allow you to export your data from “mydataset.mytable” to the gs bucket location and file name compressed as GZIP. The default export format is CSV. If you want to export in another format, you can specify it by --destination_format. The command below shows how you can use that option to export in JSON.
bq extract \
--destination_format NEWLINE_DELIMITED_JSON \
'mydataset.mytable' \
gs://target-bucket/exportfile.json
For csv export, check two more handy options:
bq extract \
--compression GZIP \
--field_delimiter delimiter \
--print_header=boolean \
'mydataset.mytable' \
gs://target-bucket/exportfile.csv
Notice that you can add the delimiter and header options as above.
- For delimiter, \t and tab are accepted names for tab.
- For print_header, true (default) means you include the header columns in your export file.
After exporting the CSV, you can import it using Data Import Wizard.
Step 2: Load data into Salesforce using Data Import Wizard
Data Import Wizard is Salesforce’s native feature that allows users to easily upload data. Using the feature, you can import up to 50,000 records at a time. To load your csv file, follow the steps below.
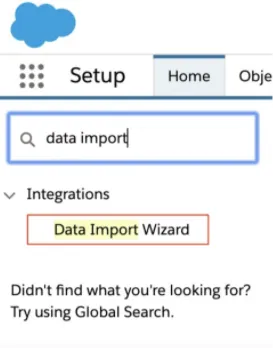
- Go to Setup in Salesforce and type Data Import Wizard in the Quick Find bar as below. Then, select Data Import Wizard.
2. Check the prompt information and click Launch Wizard.
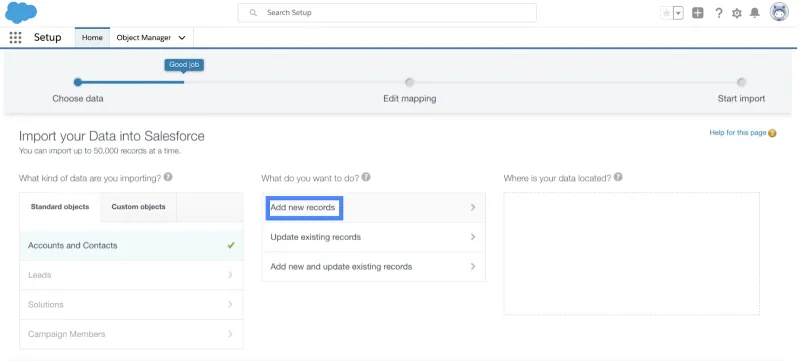
3. You can either select
- Standard Objects to import accounts, contacts, leads, solutions, person accounts, or articles.
- Custom Objects to import custom data.
4. Decide the type of import - add new records, update existing records, or add and update.
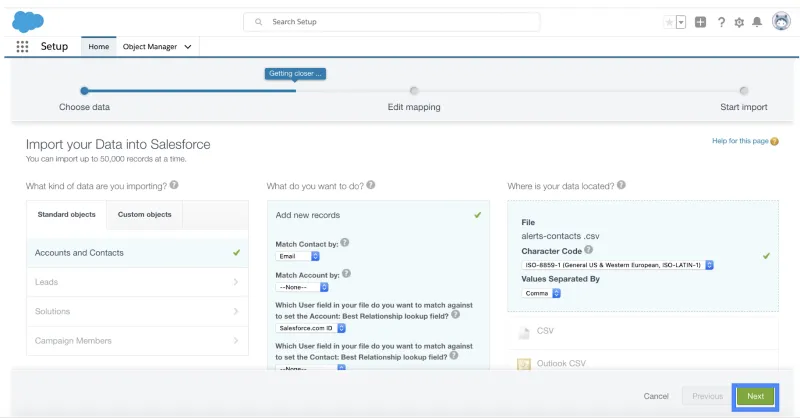
5. The rest of the fields depend on your use case. You will also be prompted to upload your csv file. For the encoding field, leave it as it is unless you used a specific encoding.
6. Select comma or tab for the value separator. Click next.
7. Map the fields between your source CSV data and target data.
8. Review and start your import. Click next.
9. Finally, check your import status.
As mentioned previously, this method is similar to the previous method, Data Loader. If you are importing less than 5m records, this might be a good solution for you.
Now we’ll look at the second method which allows you to sync a larger quantity of data faster, and more reliably. It’s called reverse ETL with Census.
Method #3 - Reverse ETL with Census
Reverse ETL with Census helps you easily sync data from a data warehouse (e.g. BigQuery) to an operational tool (e.g. Salesforce). Whether you’re syncing only a few hundred records of data per day, or thousands of rows of data per second, Census can easily handle the workload. The platform doesn’t require a CLI or web downloads. You can query data using our built-in SQL compiler, or use the no-code feature, segments to complete syncs. Census’s built-in API integrations (including Salesforce and Salesforce Marketing Cloud) help you easily sync data to all the standard and custom columns fields you desire. Additionally, you can trigger sync automatically at the time and frequency of your choice using the scheduling tool. Best part? You can try Census for free!
Prerequisites
- Sign up for a free Census trial (no payment necessary).
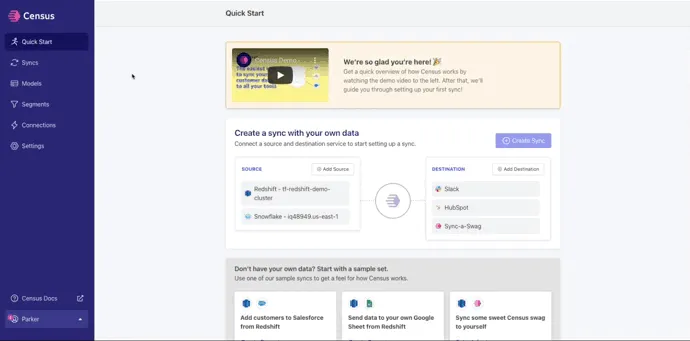
Step 1: Connect BigQuery and Salesforce
- From the Quick Start page, click add source, search for BigQuery, and add your required credentials. Click connect.
- From the Quick Start page, click add destination, and search for Salesforce. Sign into Salesforce account and click connect.
Step 2: Build a model
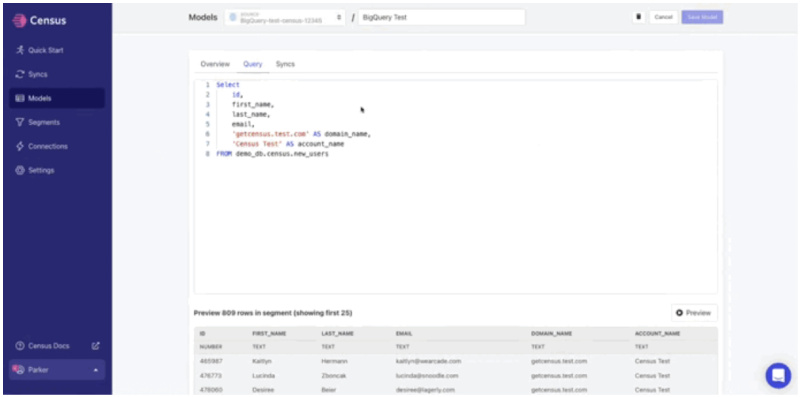
- Build a model using your preferred method: SQL, dbt, or Looker. Click models from the navigation bar, create a model.
- Give your model a name (ex. “Test Model”). If you’d like to preview your query, click preview. Otherwise, click save model. Here’s an example of creating a model in Census:
Step 3: Create sync
- Navigate back to the quick start page, select your newly created data source, BigQuery and your newly created destination, Salesforce. Click create sync.
- Configure your sync:
- Select your newly created model from the source dropdown.
- Choose from one of the 50+ Salesforce destination objects (ex. Account, Lead, etc.).
- Choose how to update the destination records (ex. Update or create, Update only, etc.).
- Choose how you want the Salesforce destination records matched (ex. Company ID, email, etc.).
- Choose which properties (columns) should be updated on Salesorce (ex. Domain, Account Name, etc.).
- Click next, check run sync now, and create sync.

Where to go from here
Now that you’ve seen four separate methods for syncing data from Snowflake to BigQuery, you can choose the option that suits your needs. If you’re doing a one-off, small to medium sized sync (less than 50 million records), I recommend methods #1 or #2. If you want to sync BigQuery to Salesforce on a regularly and in an automated fashion, I recommend method #3, reverse ETL with Census. In fact, you can start using Census for free.
Happy syncing!