Prioritize Customer Support Tickets in Zendesk
Sync your most important customer metrics like lifetime value, total orders, customer satisfaction score, or total profit, to your CX tool and focus on your highest-priority customers.
Overview
When it comes to customer satisfaction, nothing tops efficiency. Rapid issue resolution can mean the difference between a one-time buyer and a lifetime customer. It's even a benefit that consumers are willing to pay more for! But with limited CX resources, how can you identify your customers who are likely to have a high customer lifetime value?
In this recipe, we'll show you how to prioritize tickets in Zendesk based on the customer data you already have. This is a simple example but you can apply this approach to any scoring method that applies to your business.
A better approach to customer data integration
Zendesk has integrations with the most popular ecommerce platforms and CRMs, but we can make it even more effective with the power of operational analytics. For example, the Shopify app integration for Zendesk works for taking immediate action on tickets, but itâs less useful for organizing and reporting on your CX activity as a whole.
If we want to do something like creating a view that shows customers with a LTV above $50, or increasing priority for users with more orders, we need this data to be a field on the end user in Zendesk, and not just a number in the Shopify widget. The best way to get the most trusted up to date data into your CS tool is to sync it directly from the data warehouse.
You might also want to prioritize CX tickets based on things like:
- A customer's total profit (including sales and returns)
- A customer's purchase history including online and offline touchpoints
- A customer's predicted lifetime value
Youâll need more data and better analysis to create these types of metrics and the best way to collect and curate all this data is in your data warehouse. With Census, it's easy to share a complete customer 360 across all your customer engagement apps.
Use Case
First, we need to create the user fields within the Zendesk admin UI. Navigate to admin, and select "User fields" under "People". Add fields that you want to be able to filter and report on in Zendesk, such as LTV, most recent order date, and order count. Note: the Shopify customer ID should be added as a string even though it's an integer because Zendesk integers can't be longer than 12 digits.
â

â
Then we pull them from the Fivetran Shopify connector, and send them to Zendesk!
Here's the code to generate these metrics if you are using Fivetran Shopify Connector.
The end result in Zendesk is customers that look like this:
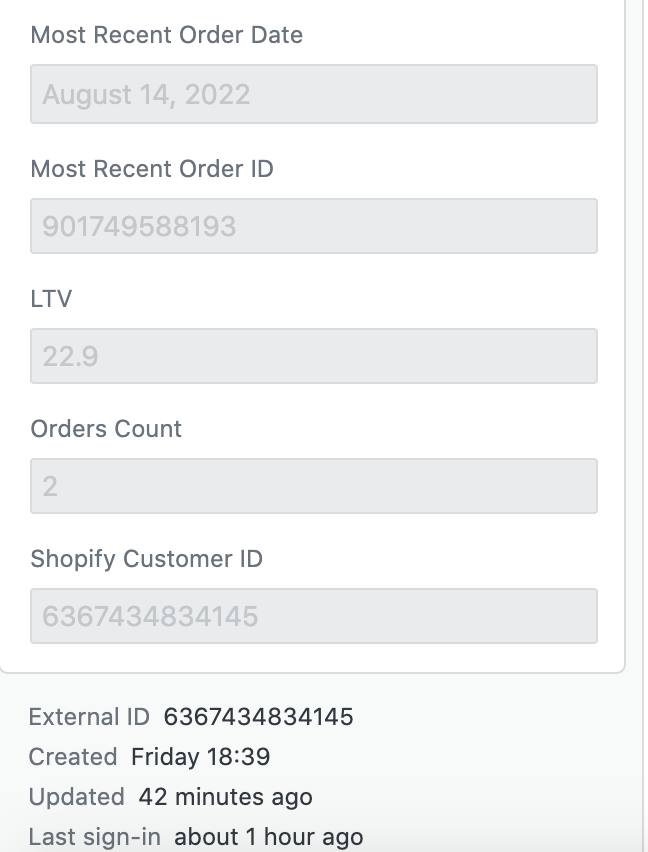
And the ability to set up triggers like this:
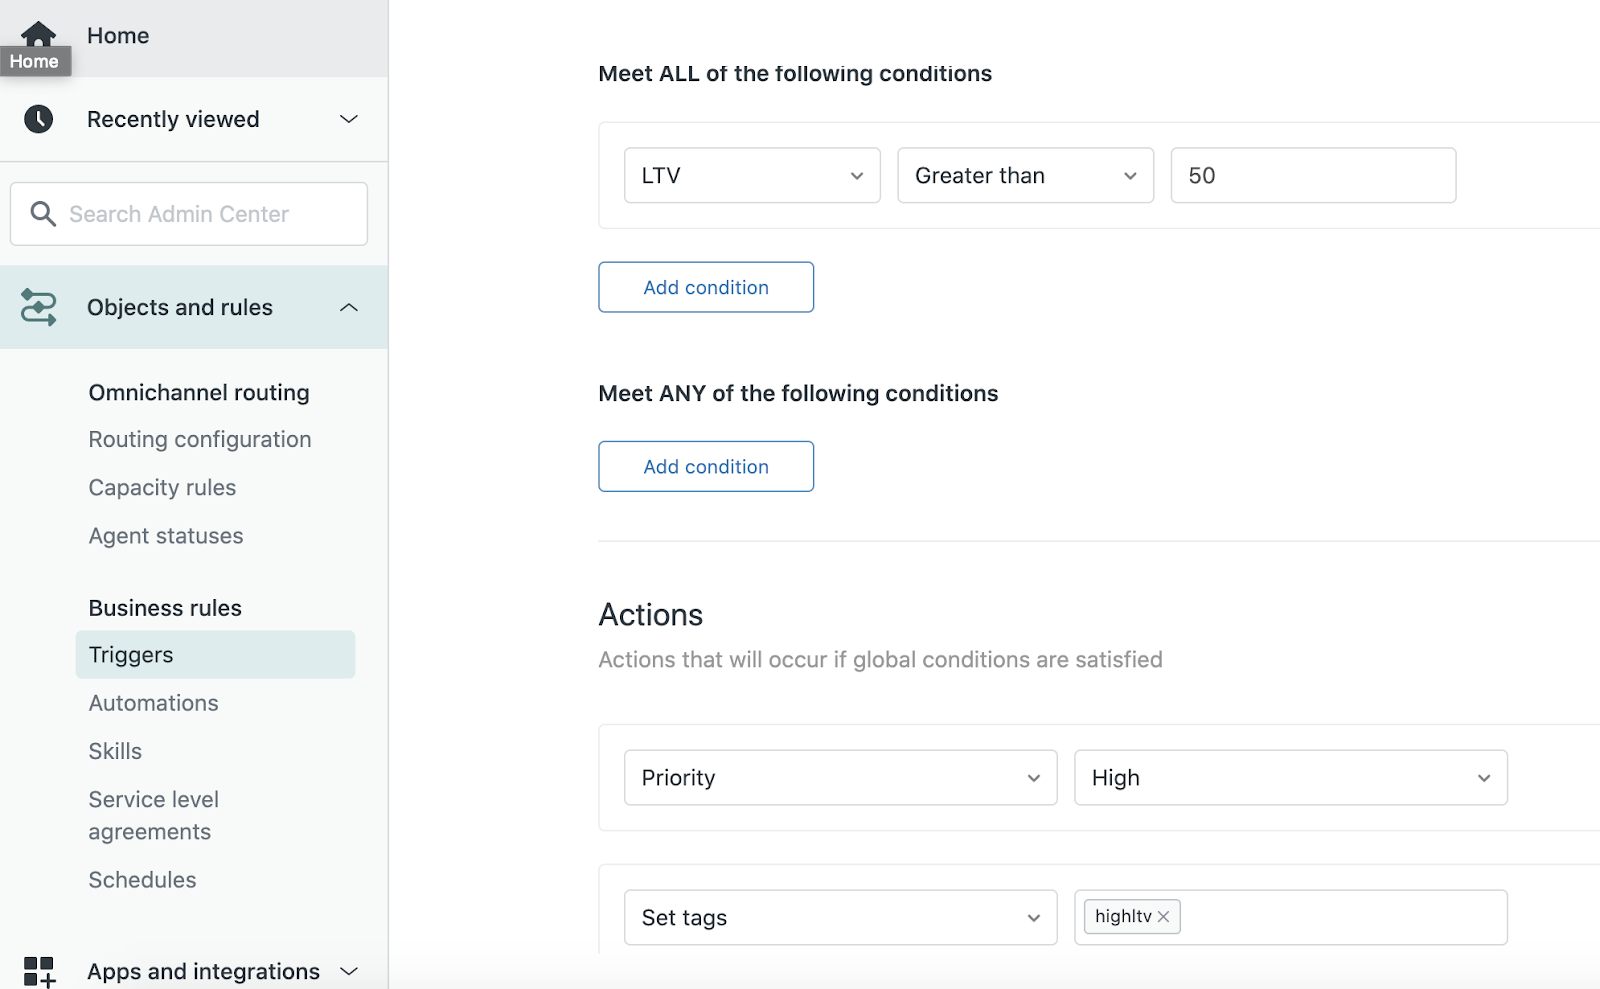
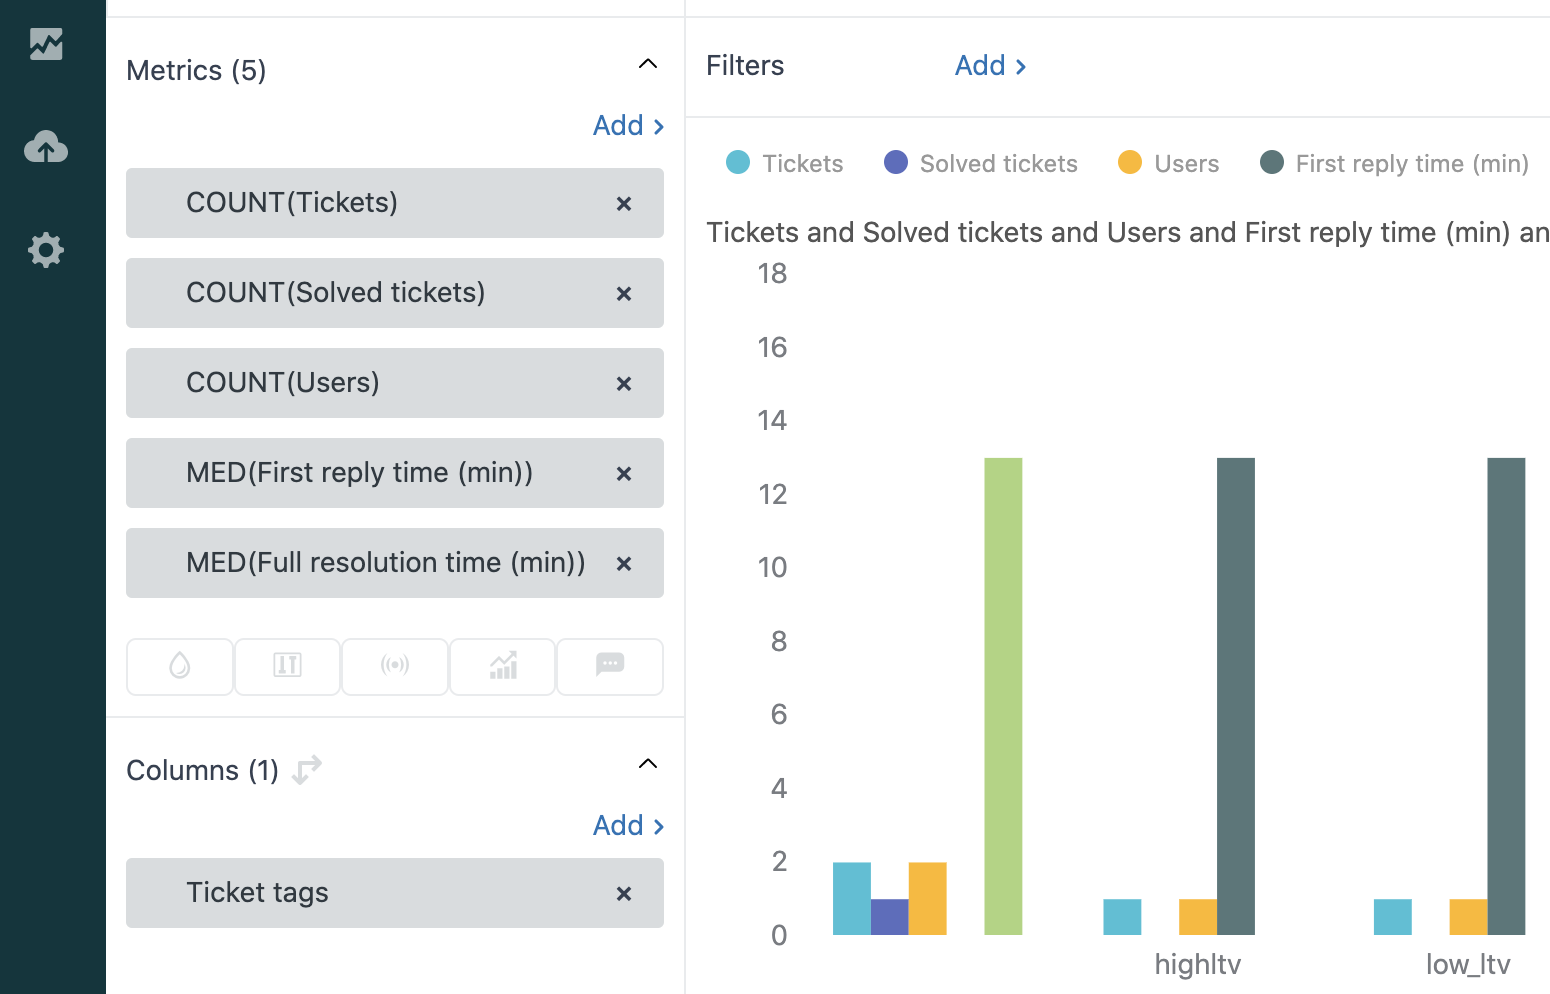
And reports like this:
